Two regular dudes who happen to be huge fans of American craft beer.
Mash Tun Build Part 1
By scot in Home Brewing on Saturday, October 2nd, 2010

I already built this mash tun, tested it, and have taken it apart. But I still thought it would be nice to share. Also, this wasn’t my idea: I found it on youtube. I watched a lot of videos, read a lot of forums, and thought this build was the simplest and most straight forward. They also explained every step clearly.
Now, why did I take the mash tun apart? First, and most importantly, I didn’t like the angle at which the hole in the cooler was. In this cooler it sits at about 45 degrees, angling downwards, obviously to help water drain. This is a problem once you get your ball valve and barb fitting onto the end of it. The length of this together allows for the part of the mash tuns weight to sit on this assembly. I was concerned that once full of grain and water, this could easily create a problem: snap off, leak, etc. Yes, I could situate the cooler in such a way that this would “hang” off of a table or the like, but the cooler was back heavy (it had wheels and an extension handle to easily be pulled) and I thought this unbalance could cause a bump to dump the full container all over. I make enough messes when I brew, I don’t anything helping out. Second, the process of setting up the mash tun, if you are careful, doesn’t ruin the cooler in any fashion. You can just unscrew a couple of parts and screw in the originals and, wallah, you cooler is back to the way it came from the factory. It will still work as a cooler for someone else.
So, if you decide to do this build, you are fairly warned about this cooler really being an effective mash tun.

The part list for this build isn’t that big (as most aren’t) and the ensuing assembling is easy too. I purchased all the parts at a local home improvement store. Amazingly I had and awesome associate to help me that had been to Oktoberfest in Germany at least a half dozen times (he was in his 70s), sharing his experiences along the way.
Parts list:
- 50 qt. cooler – $30.00 (on sale)
- 18 gauge ceiling hang wire – $4.08
- 4′ stainless steel washing machine hose – $8.99
- 1/2″ brass pipe tee – $4.94
- 1/2″ ball valve – $6.78
- 1/2″ barb X 1/2″ mip – $10.59 (3)
- #8 hose clamps – $1.57 (2)
- 1/2 X 1 1/2″ brass pipe nipple – $3.59
- 1/2″ steel locknut – $0.38 (2)
- 1/2″ threadseal tape – $1.98
The total, with tax, came to about $80.00. I guess you could go with pvc fitting and save some money on the brass, but you are only building this once for a hobby, so why be cheap and/or cut corners?
I will try to explain the steps with a finished picture next to each, to give an idea of what I am talking about.

1. Remove the plug that holds the water in the cooler. This is screwed in and, since it is plastic, is really only hand tightened as not to strip the fitting. You should be able to unscrew this easily. Save the rubber gasket from the inside of the cooler, you will reuse this when putting it back together. If you don’t have a cooler with a plug, you can always drill out a hole.

2. Now place the rubber gasket from step 1, back into place on the inside of the cooler.
3. Take the 1/2″ x 1 1/2″ pipe nipple (1 1/2″ represents the length of the nipple) through the hole and put a 1/2″ lock nut on either side, making sure the lock nuts are snug. Don’t over tighten as you can ruin the rubber gasket and/or start to indent into the cooler.
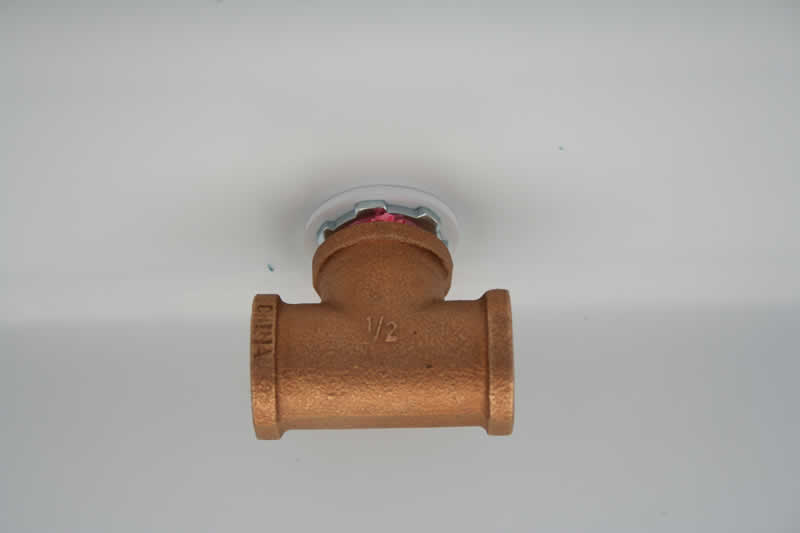
4. After putting some threadseal tape on the pipe nipple (inside of the cooler), thread the 1/2″ tee onto the nipple. You will probably need some type of pliers to hold the nipple so as the tee tightens, it doesn’t start to turn the entire fitting. Also, since this is on the inside of the mash tun, realistically, you only need to hand tighten. Why? If it leaks, does it matter when it is on the inside?

5. Take the 1/2″ stainless steel washing hose and cut off both of the ends. Waste as little of this as possible, so cut off as close to the fittings possible. There is a silicon tubing on the inside of the stainless steel shell. Remove it. Don’t pull on the stainless steel, but work it downwards off of the tubing. It took about a minute, tops, to remove this on the four foot length.
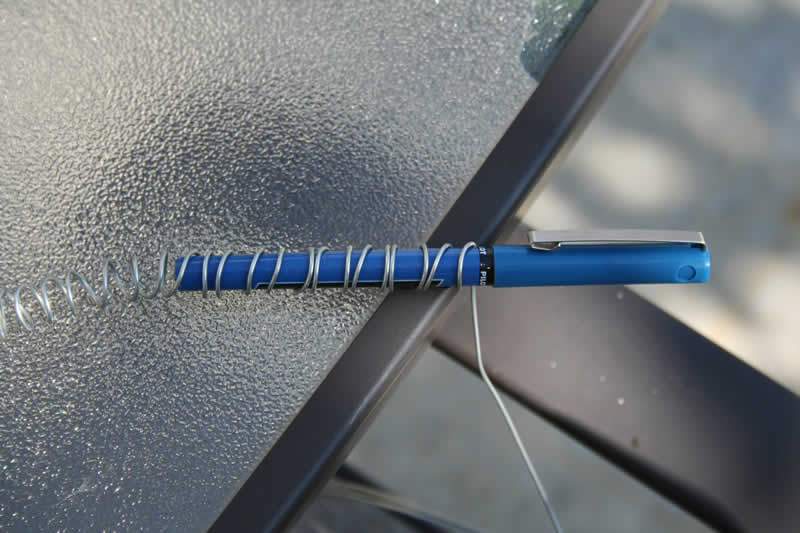
6. Start wrapping the 18 gauge wire around a pen or pencil that is smaller in diameter than the stainless steel hose that you have from step 5 above. Be ready for your fingers to get a touch sore after doing this as the wire just slowly wears your fingers.
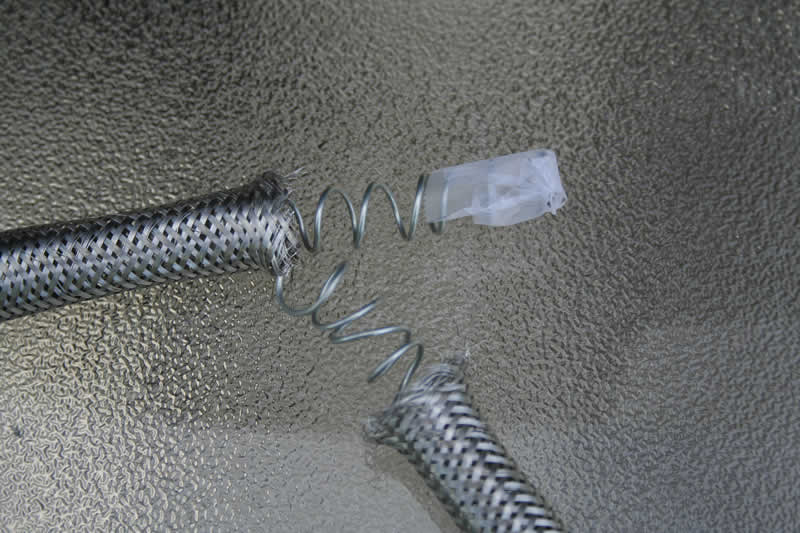
7. Put a little tape on one end of the wire coil: this will make it not get snagged on the chain mail like stainless steel tubing. Slide it until you have equal amounts hanging out of each side.
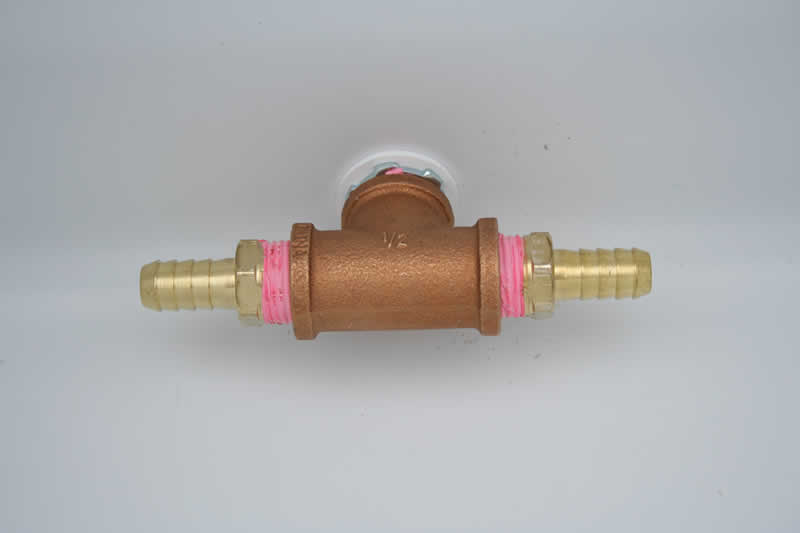
8. Take two of the 1/2″ barb X 1/2″ mip and add thread seal tape to each of the male threaded ends. Screw those into either end of the 1/2″ tee you installed in step 4.
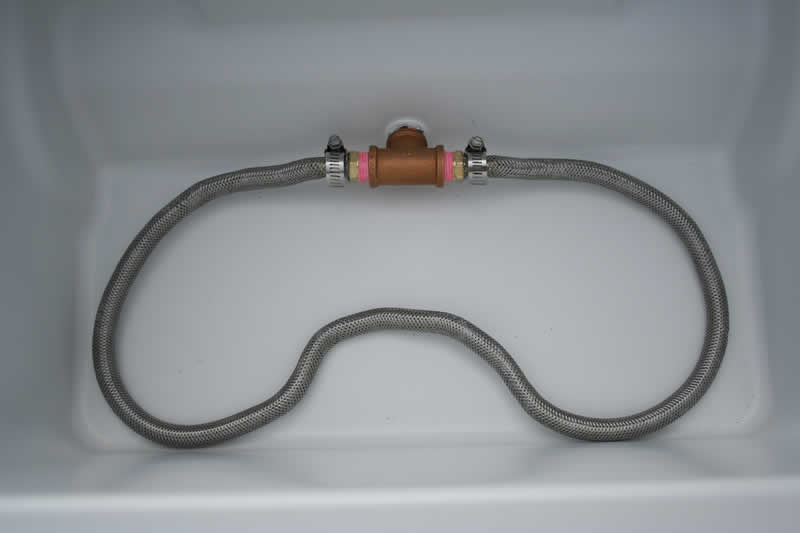
9. Cut excess wire added to the stainless steel tubing so that it can be placed on the barbs. Dry run testing this to get the right length helps. Make sure to cut too long and not too short. You can always cut off more. Once you are sure of the length, place the clamps around the tubing and place on the barbs. Make any adjustments in terms of shape, twists, etc. to the tubing before tightening clamps. Tighten the clamps.

10. On the outside of the mash tun, add some thread seal tape to the 1/2″ x 1 1/2″ pipe nipple installed way back in step 3. This next thing can be tricky, so make sure to have some pliers that can help you hold the fittings so they don’t turn as the ball valve tightens onto the thread. Also, before placing the ball valve onto the fitting, add the third and final 1/2″ barb X 1/2″ mip to the one end. Adding it after the ball valve is in place can be daunting.
11. Done with assembly, test for leaks!
This entire process took less than an hour and, as mentioned earlier, is easy to do. A couple pare, at most, of channel locks is all you need to help out. I hope this makes the process easier if you decide to go this route. For reasons above, I don’t like this mash tun build. I am waiting for a cooler to show up at a local store that I ordered online, then I will start my next build that is in this months’ issue of Brew Your Own magazine. That will be mash tun build part 2. Enjoy!
Tags: home brewing, mash tun
Related Posts
-
December 2023
1
- November 2023 2
- October 2023 1
- September 2023 1
- August 2023 1
- July 2023 4
- March 2023 1
- January 2023 1
- December 2022 2
- November 2022 1
- October 2022 1
- September 2022 2
- August 2022 2
- May 2022 1
- April 2022 1
- March 2022 1
- February 2022 2
- December 2021 23
- November 2021 1
- August 2021 1
- June 2021 6
- May 2021 3
- April 2021 4
- March 2021 7
- February 2021 8
- January 2021 9
- December 2020 9
- November 2020 9
- October 2020 7
- September 2020 6
- August 2020 6
- July 2020 8
- June 2020 3
- April 2020 2
- March 2020 2
- February 2020 2
- September 2019 1
- August 2019 1
- June 2019 1
- March 2019 1
- February 2019 1
- January 2019 1
- December 2018 2
- September 2018 1
- July 2018 1
- June 2018 3
- March 2018 3
- February 2018 2
- January 2018 5
- December 2017 2
- November 2017 3
- October 2017 2
- September 2017 3
- August 2017 5
- July 2017 2
- May 2017 3
- April 2017 3
- March 2017 2
- February 2017 1
- January 2017 3
- December 2016 5
- November 2016 4
- October 2016 5
- September 2016 2
- August 2016 5
- July 2016 1
- June 2016 1
- May 2016 3
- March 2016 2
- February 2016 4
- January 2016 2
- December 2015 1
- November 2015 4
- September 2015 1
- August 2015 1
- June 2015 2
- May 2015 2
- April 2015 2
- March 2015 3
- January 2015 1
- August 2014 4
- June 2014 1
- February 2014 1
- January 2014 2
- December 2013 1
- November 2013 3
- October 2013 2
- September 2013 4
- August 2013 5
- July 2013 4
- June 2013 3
- May 2013 1
- April 2013 2
- March 2013 4
- February 2013 2
- January 2013 3
- December 2012 3
- November 2012 4
- October 2012 4
- September 2012 5
- August 2012 3
- July 2012 3
- June 2012 5
- May 2012 6
- April 2012 5
- March 2012 13
- February 2012 10
- January 2012 16
- December 2011 18
- November 2011 33
- October 2011 31
- September 2011 30
- August 2011 32
- July 2011 32
- June 2011 30
- May 2011 31
- April 2011 35
- March 2011 31
- February 2011 29
- January 2011 33
- December 2010 32
- November 2010 7
- October 2010 12
- November 2023 2